Hey there, fellow plastics gear heads! If you’re reading this, you’re probably knee-deep in PET injection molding—chasing faster cycle times, fewer downtime headaches, and that sweet spot where output hits max without killing part quality or wear on your machine. Full disclosure: I’ve been working with PET injection molding machines for over a decade, and let’s be real, everyone’s got that one “tinkerer” trick they swear by that actually works. But today, I’m breaking down the stuff that doesn’t waste time, the stuff that actually moves the needle for your production lines. No fluff, no complex jargon, just what I’ve seen help shops go from 10k parts a week to 15k without buying a whole new line. PET Injection Molding Machine

First off, let’s start with the thing everyone overlooks at first: material prep. PET is finicky—way more moisture-sensitive than, say, HDPE. If you skip proper drying, you get splay marks, weak parts, and even pressure spikes that force you to slow cycles or scrap half your run. I can’t tell you how many times a shop has called me panicking because their parts are “coming out like garbage” only to find their dryer’s filter is clogged or the air flow is half what it should be. Here’s the fix, and it’s not just “run the dryer longer”: match your dryer’s output to your machine’s throughput. A 100-ton machine running 80 tons of PET a day needs a dryer that’s rated for at least 20% more than that, not some underpowered unit you grabbed cheap years ago. Also, purge the dryer hopper every time you switch resins or even change colors—small resin beads that sit at the bottom of the hopper get stale and mess with melt consistency. Pro tip I’ve pushed to so many of my clients: get a moisture sensor that hooks up to your machine’s control panel. It’ll trigger an alert if moisture creeps above 0.02%—the sweet spot for PET. No more guessing, no more waiting hours to test a part.
Next up, screw and barrel maintenance. I see shops run the same barrel and screw for 5+ years straight, acting like it’s invincible. Newsflash: PET is abrasive, especially with recycled content, and over time, the screw’s flight starts to wear just enough that melt mixing gets spotty. That means you have to crank up injection pressure to get consistent fills, which slows cycles and wears the machine out faster. Here’s the playbook: do a visual check of the screw and barrel every 2 million shots (that’s roughly every 6 months for most shops running full time). If you see grooves on the screw flight or scratches on the barrel wall, don’t wait—swap them. We sell replacement screws specifically for PET that have a nitrided coating, and trust me, it’s worth the extra cash. I had a client last year who skipped that, and his pressure was 15% higher than it needed to be. After a screw swap, his cycle time dropped by 8 seconds per part, and part reject rates went from 4% to less than 1%. That’s pure profit right there. Also, purge the barrel properly between runs—don’t just dump the old resin and add new. Use a PET-specific purge compound, not generic stuff, because generic purge can leave residue that causes splay. I’ve seen shops use cheap purge and ruin a whole batch of high-quality PET parts—total waste.
Then there’s optimizing cycle parameters, and this is where a lot of people overcomplicate it. Let’s be real, every machine and every part is a little different, but there are universal wins here. First, don’t overheat the melt. PET’s ideal melt temp is between 260C and 280C. If you crank it to 300C to “make it flow better,” you’re just wasting energy, shortening the barrel’s life, and making parts prone to warping. I worked with a shop that was running at 295C because they “had always done it that way”—after we dropped to 275C, their cycle time went down 5 seconds, and energy use dropped by 12%. Next, injection speed and pressure: run as fast as you can without flash or short shots. Flash happens when you push too much material too fast, so test in small increments—bump speed up by 5% until you get flash, then back off a tiny bit. Also, use hold pressure only as long as you need it. Too many people hold pressure for 5 seconds just to be safe, but if you time it right, hold time should be just enough to pack the part without overpacking it. For small PET preforms, that’s usually 1-2 seconds; for thicker parts, maybe 3. Cut that hold time by even 2 seconds, and over a thousand parts, that’s 2000 seconds saved—almost 35 minutes of extra production a day. Oh, and don’t forget cooling time—this is where most of the cycle is, so don’t sleep on it. Use chilled water that’s between 10C and 15C, and make sure your mold’s cooling lines are clean, not clogged with mineral buildup. We’ve had clients who skipped flushing cooling lines for a year, and their cooling time was 4 seconds longer than it needed to be. A 20-minute flush with descaling solution fixed that, and their output jumped 8% instantly.
Now, let’s talk about the machine itself—hydraulics and controls. A lot of older PET machines have inefficient hydraulic systems, wasting energy every cycle. If your machine is 10+ years old, upgrading to a variable-frequency drive (VFD) for the hydraulic pump can cut energy use by 20-30% straight up. VFDs adjust the pump’s speed to match what the machine needs, instead of running it at full speed nonstop. I installed one on a 120-ton machine for a bottle cap shop last year, and their electric bill went down by $1,200 a month—nothing to sneeze at. Also, keep the machine’s control software updated. Wait, I know, updating software sounds like a hassle, but modern updates fix glitches that cause uneven injection, slow cycle times, and even unplanned stops. We push updates to all our machines every quarter, and clients who install them report way fewer random errors. Another quick win: keep the machine clean. PET dust is abrasive, and if it gets into the hydraulic lines or control sensors, it causes all kinds of problems—pressure drops, false alerts, even unplanned stops. Wipe down the machine daily, blow out the dust on the control panel and pump weekly, and don’t let resin build up around the hopper feed. Small stuff, but it adds up to less downtime.
Oh, and let’s not sleep on molds. A good mold for PET is non-negotiable, but even a good mold can get less efficient over time. Polish the mold cavity and core regularly—rough spots cause parts to stick, which means longer ejection time or even having to re-run parts because of surface defects. Also, make sure the mold’s vents are clean and not clogged. Vents let air escape when you inject the PET, and if they’re blocked, you get short shots, which force you to slow injection speed or scrap parts. We offer vent maintenance for all our mold customers, and it’s one of the most underrated things we do. A client with a 48-cavity preform mold was having consistent short shots in 2 cavities—after cleaning the vents, that problem was gone, and his cycle time dropped because he could inject faster without shorts.
Wait, let’s talk about downtime—unplanned downtime is the enemy of efficiency. I’ve seen shops lose 2-3 hours a week to unplanned stops because they skipped small maintenance. So make a simple maintenance schedule, not some 20-page manual that no one will follow. Something like: daily: check dryer filter, wipe machine, test part for splay. Weekly: flush cooling lines, inspect screw wear, clean mold vents. Monthly: check hydraulic fluid level and condition, test moisture sensor. That’s it, simple, no fancy stuff. Also, keep spare parts on hand—don’t wait for a screw to wear out before ordering a spare, or for a dryer filter to break. I always tell clients to keep 2-3 of the most common spare parts (filters, purge compound, O-rings for the mold) in stock. A 10-minute part swap is way better than waiting 3 days for a part to ship, which kills your production schedule.
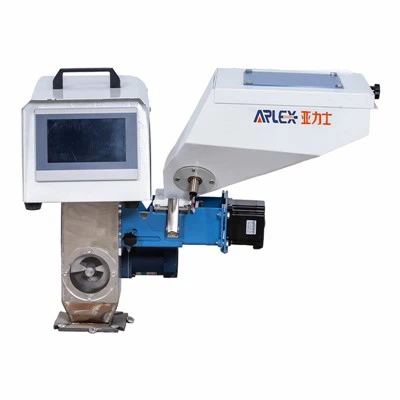
Now, let’s get real—there’s no “magic button” to make your PET machine run 100% faster tomorrow, but these small, consistent steps add up so fast. I’ve seen shops implement these changes and go from 8k parts a week to 12k, without buying a new machine. That’s thousands in extra revenue every month, and way less stress. The key is paying attention to the small stuff—drying, screws, cooling, not overheating melt. All the big stuff (buying a new machine) will come later, but if you fix the basics first, you’ll get way more out of what you already have.
Hopper Dryer If you’re dealing with specific issues—like consistent short shots, long cycle times, or too much scrap—hit me up. We work with all sizes of shops, from small bottle cap operations to big packaging manufacturers, and we can help you tweak your setup or upgrade parts to fit your needs. No hard sell, just real advice from someone who’s been in this game for years and knows what actually works, not just what sounds good on a spec sheet. Let’s chat about your line and how we can get your PET machine running at its best.
References
- International Society of Plastics Engineers (SPE). (2021). PET Injection Molding: Process Fundamentals and Efficiency Optimization. SPE Press.
- Plastics Technology. (2022). "Best Practices for PET Drying and Material Preparation in Injection Molding." Plastics Technology Magazine.
- VDMA (German Engineering Federation). (2023). Energy Efficiency Guidelines for Plastic Processing Machinery. VDMA Publishing.
- American Injection Molding Institute (AIM). (2020). Preventive Maintenance Schedules for Injection Molding Machines. AIM Training Series.
Ningbo Yalishi (Arlex) Plastic Machinery Co., Ltd.
Address: No.63, Huangsu East Road, Industrial Zone, Dongqian Lake Tourist Resort, Ningbo, Zhejiang Province
E-mail: leo@arlex.cn
WebSite: https://www.arleximm.com/
